
How to make Caramel Apples:
Caramel apples have been a part of American culture for a long time, from harvest festivals and Halloween parties to family weekends. They are most often thought of as fall things, but they are popular all year long. Making caramel apples at home is easy, cheap, and a great way to get people together.
Caramel apples are a simple and tasty treat that you can enjoy on a quiet night in or with kids as part of an interactive project. You can make a batch that rivals any fairground favourite with just a few simple ingredients and some time to prepare.

Why Caramel Apples Remain a Popular Treat
In recent years, Americans have been more interested in foods that are both familiar and new. Both of those are met by caramel apples. They make you feel nostalgic while still giving you room to be creative. Any choice you make, like picking a certain kind of apple, toppings, or a chocolate drizzle, is unique.
They also align with the shift toward homemade and thoughtful snacks. With more families and individuals cooking at home, simple recipes like this feel rewarding without requiring professional skills or hard-to-find ingredients.
Start with the Right Apples
The foundation of any caramel apple is, of course, the apple itself. Choose firm apples with a slight tartness to balance the sweetness of the caramel. Granny Smith is a traditional favorite because its bright, crisp bite complements the rich coating. Fuji, Honeycrisp, or Gala can also work well if you prefer a slightly sweeter base.
Before you coat them, give your apples a proper prep:
How to Prepare Apples for Caramel Coating:
- Scrub Thoroughly: Use a rough sponge or vegetable brush to remove any waxy residue from the skin. Many store-bought apples have a protective coating that can prevent caramel from sticking.
- Dry Completely: Moisture is the enemy of good caramel coating. Dry each apple carefully.
- Chill in Advance: Pop your cleaned and dried apples into the refrigerator for at least two hours before coating. Cold apples allow the caramel to set faster and cling more evenly.
What You’ll Need
A smooth caramel coating and a solid base of supplies make all the difference in how your caramel apples turn out. Don’t skip these key items:
Essential Tools and Ingredients:
- Wooden sticks or candy apple skewers
- Parchment paper or silicone baking mat
- Individually wrapped caramel squares or caramel made from scratch
- Heavy-bottomed saucepan or oven-safe dish (depending on your method)
- Decorative toppings like crushed nuts, mini chocolate chips, or sprinkles
Many home cooks opt for pre-wrapped caramel candies because they melt consistently and save time. Look for a variety without added fillers to get a better texture and flavor.
Melting Caramel: The Easy Way
One of the biggest concerns when making caramel apples is melting the caramel without burning it. A slow, steady method gives the best result with the least stress.
Oven Method (Recommended):
- Set your oven to 200°F.
- Unwrap your caramel squares and place them in an oven-safe dish with a splash of water or cream (to thin slightly).
- Let them melt for 60–90 minutes, stirring occasionally.
This approach prevents overheating and eliminates constant stirring.
Other Melting Options:
- Stovetop: Place caramel and a tablespoon of cream or water in a saucepan over low heat. Stir continuously to prevent sticking.
- Microwave: Melt in 30-second intervals, stirring between each. This method works quickly but requires close attention to avoid overheating.
Dipping and Decorating
Once your caramel is fully melted, remove the apples from the fridge and insert the sticks into the stem end. Tilt your pot or dish slightly, dip each apple, and rotate it to get an even coat. Let excess caramel drip off before placing the apple on parchment paper.
Now comes the fun part—customizing your apples.
Topping Ideas:
- Chopped peanuts or pecans
- Toasted coconut
- Mini chocolate chips
- Crushed pretzels
- Crumbled cookies
- Sea salt flakes
- Drizzled melted chocolate (dark, milk, or white)
You can create a “dipping station” with a few bowls of different toppings. This is a great way to turn the process into a social or family-friendly activity. Everyone can create their own combinations, which adds an extra layer of enjoyment.
Letting the Apples Set
After decorating, allow the caramel apples to sit at room temperature for at least 30 minutes. If you're not serving them right away, you can refrigerate them, but be aware that refrigeration may cause slight condensation which could affect texture. For best taste and appearance, serve them within 24 hours.
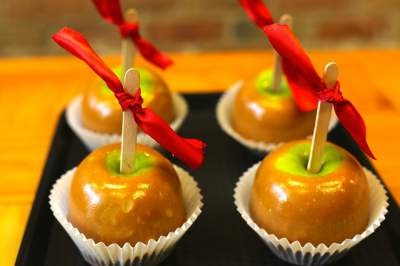
If you’re wrapping them for gifting or presentation, wait until they are fully set. Use clear cellophane and a twist tie or ribbon to keep them secure and attractive.
A Homemade Treat Worth Making Again
Caramel apples continue to capture attention because they offer something more than just taste—they provide an activity, a memory, and a reward all in one. In a culture that values both creativity and convenience, they fit right in.
By using fresh ingredients and quality chocolate (like couverture from Santa Barbara Chocolate), you can take this traditional snack and turn it into something truly special. Whether you're making them for a holiday party, school event, or just a fun kitchen moment, caramel apples are always a good idea.
