How To Make Vegan “Milk" Chocolate
Creamy, Rich, and Dairy-Free Chocolate at Home
Making vegan milk chocolate at home is simple, fast, and doesn’t require any fancy equipment—or even a stove. This recipe takes just four pantry-friendly ingredients and about 10 minutes of hands-on time. It’s perfect if you’re avoiding dairy, refined sugar, or additives commonly found in store-bought bars.
What makes this version stand out is how smooth and satisfying it tastes while staying vegan, paleo, gluten-free, and refined-sugar-free. Whether you’re mixing up a batch for yourself or gifting it to someone who loves chocolate, this recipe is a reliable favorite that never lasts long.
Why Homemade Vegan Milk Chocolate?
Dairy gives traditional milk chocolate its creamy texture. A few clever substitutions will help you to create a totally plant-based version that is just as tasty. Ingredients including full-fat coconut milk, maple syrup, and premium cacao powder lend this dish a natural richness, mild sweetness, and a smooth melt that satisfies without sacrifice.
Ingredients You’ll Need
You only need four ingredients to get started:
- ½ cup cacao powder
Use pure, non-alkalized cacao powder to retain the rich flavor and antioxidant benefits. - ½ cup coconut oil (melted and cooled)
Coconut oil creates the silky texture that gives the chocolate its melt-in-your-mouth feel. - ¼ cup cream top from canned full-fat coconut milk
Only scoop the thick cream from the top—this gives the chocolate that milk-like creaminess. - ½ cup maple syrup
Adds natural sweetness without refined sugar or corn syrup.
Optional: pinch of sea salt or a splash of vanilla extract for extra flavor depth.
Step-by-Step Method
1. Mix the Base Ingredients
In a mixing bowl, add the cacao powder and melted coconut oil. Stir well until smooth and fully blended. You may need to scrape down the sides as you go to avoid lumps.
2. Add the Coconut Cream
Next, scoop the thick cream from the top of a can of full-fat coconut milk (avoid the watery portion). Add it to the bowl and stir until fully incorporated. This step helps give the chocolate its “milky” quality without using dairy.
3. Sweeten with Maple Syrup
Add the maple syrup and mix thoroughly. The mixture should become thick, glossy, and pourable. Adjust the sweetness slightly if you prefer your chocolate more or less sweet.
How to Shape and Set Your Chocolate
Option 1: Use a Baking Sheet
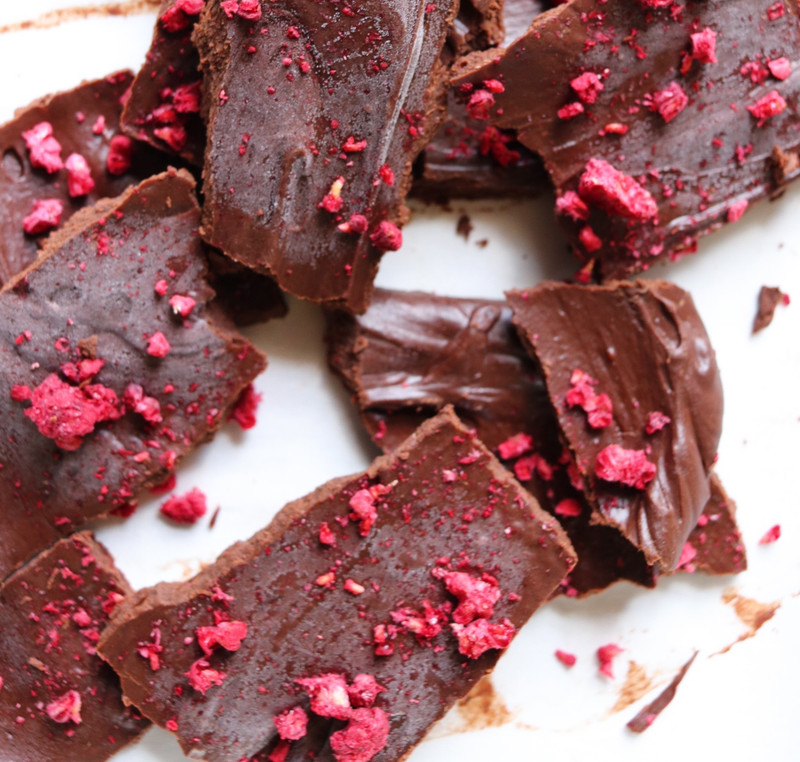
Line a small baking sheet or tray with parchment paper. Pour the mixture onto the sheet and spread evenly using a spatula. This method creates thin chocolate bark that can be broken into pieces after freezing.
Option 2: Use Silicone Molds
For a more polished result, pour the mixture into silicone chocolate molds. You can find bar-shaped molds online, or get creative with hearts, squares, or rounds.
Final Step: Freeze
Transfer your tray or mold to the freezer for at least 1 hour, or until firm. Once set, remove and store in an airtight container. Keep your chocolate in the fridge for a softer texture or in the freezer for a firmer snap.
Make It Your Own: Flavor and Texture Ideas
Once your base chocolate is ready, feel free to get creative. Here are a few ways to switch it up:
Add-Ins
- Freeze-dried raspberries: Adds bright, tart contrast
- Chopped almonds, pistachios, or hazelnuts: For crunch and nutty flavor
- Dried fruit: Think cherries, mango, or banana chips
- Crushed pretzels or granola: A sweet-and-salty twist
- Peppermint or orange zest: For a fresh or citrusy edge
Filling Ideas
Before freezing, place a small spoonful of peanut butter, almond butter, or tahini in the center of each mold for easy filled chocolates. Let the chocolate cover the filling, then freeze as usual.
Another Use: Chocolate Frosting
Here’s a fun bonus: before freezing, the chocolate mixture is thick and spreadable—perfect as a frosting for cakes, brownies, or cupcakes. It's rich, creamy, and naturally sweet. Use it immediately as a topping, or pop it in the freezer if you're going for classic chocolate bars.
How to Store Vegan Milk Chocolate
Once frozen, your vegan chocolate should be stored in an airtight container.
- In the refrigerator: Keeps soft and creamy, ideal for snacking
- In the freezer: Extends shelf life and gives a firmer texture
This homemade chocolate will last several weeks in the fridge (though chances are it’ll be gone long before then).
Simple Ingredients, Smooth Results
This vegan milk chocolate recipe brings together pure cacao, creamy coconut, and natural maple syrup to create a bar that melts easily and tastes rich without being overly sweet. Whether you’re new to dairy-free recipes or just want a homemade chocolate option without mystery ingredients, this one’s worth making again and again.
Want to try it with different cocoa powders or toppings? Go for it. Once you’ve made the base, it’s easy to tweak to your taste.

